How to Transplant Herb Seedlings into the Garden
Move herb seedlings and starter plants into the ground with less stress: how to harden them off, pick the right day, plant at the correct depth and look after them for the first two weeks.
Tutorial at a glance
What you need
- Hardened-off herb seedlings
- Hand trowel
- Finished compost
- Watering can
- Plant markers
- Mulch
- Crate or shade cloth for temporary shade
Planting day is a big change for a young herb. It leaves a sheltered pot for open ground, full sun and wind, all in one afternoon. Knowing how to transplant herb seedlings gently makes the difference between a plant that sulks for weeks and one that settles in and starts growing.
The steps below work for seedlings you raised yourself and for starter plants from a nursery. Most of the effort goes into preparation; the planting itself takes only a few minutes per plant.
Check that the plants and the weather are ready
A seedling is ready to move when it has several sets of true leaves and enough roots to hold its soil together when you slide it out of the pot. If you raised yours at home, the guide to growing herbs from seed covers the stages that come before this one.
The weather matters just as much as the plant. Tender herbs such as basil should go out only after the danger of frost has passed, while hardier herbs cope with cooler conditions. The guide on when to plant herbs explains how to time each group around your own frost dates.
Harden off before planting
Seedlings grown under cover have soft leaves that have never met direct sun or a stiff breeze. Hardening off is the gradual introduction to outdoor life, and it usually takes about a week or two.
- Start with a few hours outside in a sheltered spot out of direct sun and strong wind.
- Each day, leave the plants out a little longer and give them a little more sun.
- Bring them in or cover them if a cold night or rough weather is forecast.
- By the end, they should be staying out all day and night in the conditions they will grow in.
Small pots dry quickly outdoors, so check them often during this period. For a fuller explanation of the process, see the University of Maryland Extension guide to hardening seedlings.
Good to know
Starter plants from a store may have come straight from a greenhouse. Unless they were displayed outdoors in the open, give them a few days of hardening off too.
Pick the right moment
Choose a mild, cloudy day if you can. If the weather is bright, plant in the late afternoon so the seedlings have a cool evening and a full night to recover before they face the sun. Avoid hot, windy days, which pull moisture out of the leaves faster than disturbed roots can replace it.
Prepare the bed and the seedlings
Have the planting spot ready before any plant comes out of its pot. Clear weeds, loosen the soil and work in a little compost if the bed needs it. Set the pots out on the surface first to check the layout.
Space by mature width, not by how the plants look today. A basil seedling a few inches tall can become a bushy plant, and crowded herbs compete for light and stay damp after rain. The plant label or seed packet gives the spacing for each variety.
Water the seedlings well an hour or so beforehand. A moist root ball holds together and slides out cleanly, while a dry one crumbles and tears roots.
How to transplant herb seedlings, step by step
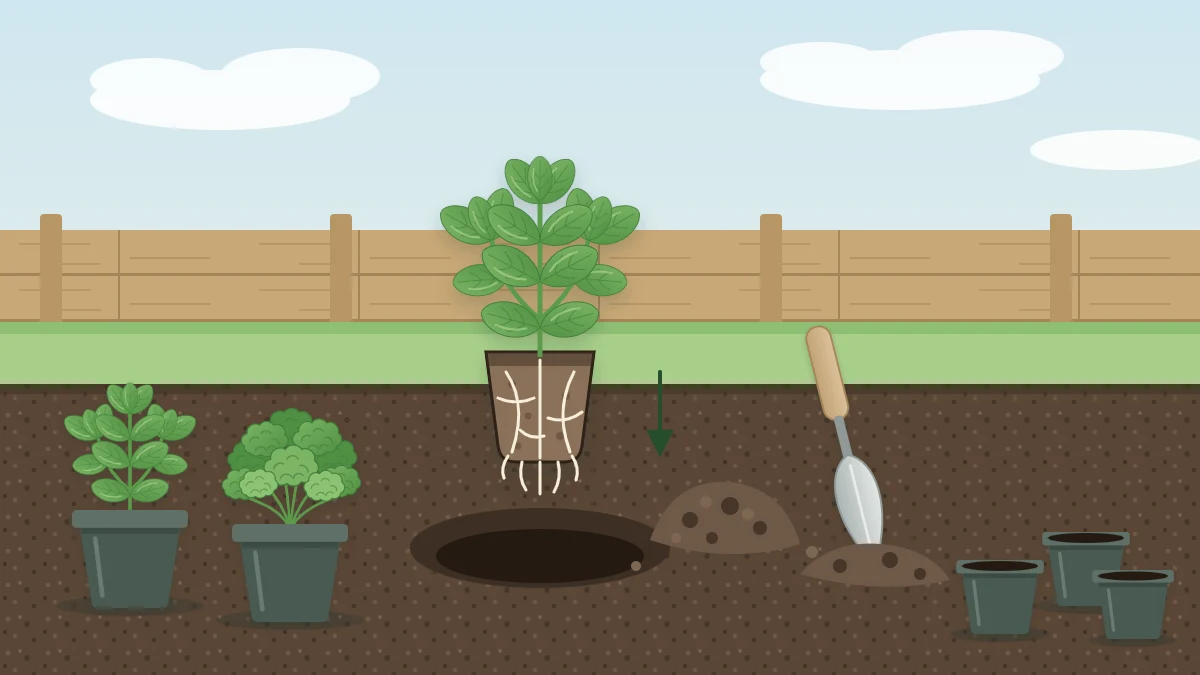
- Dig the hole. Make it a little wider than the root ball and just as deep. Loosen the soil at the sides so new roots can push outward.
- Slide the plant out. Tip the pot, support the soil surface with your fingers and squeeze or tap the sides until the root ball slips free. Never pull on the stem. With cell trays, push up from below.
- Look at the roots. If they circle tightly around the outside, tease the bottom few loose with your fingertips. Leave taprooted herbs alone, as described below.
- Set it at the same depth. The top of the root ball should sit level with the surrounding soil, the same depth it grew at in the pot. Planting deeper can keep the stem base wet.
- Fill and firm gently. Push soil back around the root ball and press lightly with your hands to close air gaps. Firm, not packed.
- Water in thoroughly. Pour water slowly at the base until the soil around the roots is soaked. This settles soil against the roots better than pressing does.
- Label the plant. A marker now saves guessing later, especially among look-alike seedlings.
Tip
Take one plant out of its pot at a time. Bare root balls left sitting on the soil dry out within minutes on a breezy day.
Notes for particular herbs
A few herbs need extra thought on planting day.
- Basil is tender. Wait until frost danger is over and the nights have warmed, even if the plants look ready sooner.
- Parsley grows a taproot and resents disturbance. Move it while it is still young and keep the root ball whole. Do not tease the roots apart.
- Nursery pots with several seedlings, common with basil and chives, can be planted as one clump or eased apart into two or three pieces while the roots are moist.
- Woody herbs such as rosemary and thyme need well-drained soil, so make sure water does not collect around the stem base after planting.
Aftercare for the first couple of weeks
New transplants live on a small root ball until fresh roots grow out into the bed. Those roots are shallow, and the top layer of soil is the first to dry. Check soil moisture often with a finger and water at the base when the soil around the root ball begins to dry. The guide on how to water herbs explains the finger check and how it differs between herbs.
Some wilting on the first sunny afternoon is common and often passes by evening. If plants droop badly, shade them from harsh sun for a day or two with an upturned crate, a piece of shade cloth or a leafy branch pushed into the soil. Remove the shade once they stand up on their own.
Hold off on fertilizer and on harvesting. Let the plant put its energy into roots first; a little compost in the bed is enough for now. A thin layer of mulch around, but not touching, the stems helps the soil stay evenly moist.
Signs your transplants have settled in
Fresh growth at the stem tips is the clearest signal that roots have moved into the surrounding soil. The plant stays upright through the afternoon, the newest leaves have good color, and a gentle tug meets resistance.
Frequently asked questions
How long does hardening off herb seedlings take?
Allow about a week or two. Begin with a few hours outside in a sheltered, shaded spot, then add more time and more direct sun each day. By the end the plants should be staying out day and night. Rushing this step is a common reason seedlings scorch or stall after planting.
Should herb seedlings be planted deeper than they grew in the pot?
No. Set each plant so the top of its root ball is level with the surrounding soil, matching the depth it grew at in the pot. Burying the stem can keep its base damp, and leaving the root ball raised above the surface lets it dry out quickly.
Is it normal for herbs to wilt after transplanting?
Some drooping on the first warm afternoons is common, because the roots are disturbed and still shallow. Check the soil with a finger before adding water, since wet soil and wilting can go together. If the soil is moist, give temporary shade for a day or two and the plants often recover.